 Here my the newest cake creation. But we'll get to the how-to's and that what-is-it stuff later.
Because at our house, your birthday starts WAY before the actual event. This year we have started a tradition of having a "birthday tree." Right now all that really means is that you get a funky colored Christmas tree put in your bedroom for the week leading up to your birthday, and for however long it takes me to put it away after that. 
Our tree is neon blue, but I have seen a variety of colors - purchase in January for a good deal. As presents are wrapped they are placed under the tree, and the degree of excitement and anticipation is built ten fold from that point on. Next year I would like to build on the tradition and have the family place notes and pictures on the tree to decorate it.

Our tree is neon blue, but I have seen a variety of colors - purchase in January for a good deal. As presents are wrapped they are placed under the tree, and the degree of excitement and anticipation is built ten fold from that point on. Next year I would like to build on the tradition and have the family place notes and pictures on the tree to decorate it.
The next tradition we have is to decorate the room of the birthday person as they are sleeping, so they wake up to a bunch of balloons, crepe paper, signs, and silliness. When I first started this tradition, Alyssa was 2 and still waking up often in the night. She happened to wake up around midnight and notice all the decorations before the daylight hit. It didn't scare her. It angered her. She marched into our bedroom, furious, and demanded that we take down all the decorations. The following year, she smiled at us before she went to bed and asked "and in the morning, after I see my balloons, will you make pancakes?" What? I thought she hated that! I scrambled around the house to find what I could to decorate with, and we haven't missed a birthday since.
We also have a new tradition of getting measured against the wall on your birthday. This might get less fun when my second daughter surpasses my first daughter in height. This will likely happen by next year, even with a 2-year age difference between them.
I've already explained my need for decorating a birthday cake in the post "Ghosts of Birthday Cake Past." This year was no exception. When Brianne saw the Barbie birthday cake I had posted, it made her want one. Oh great, here we go again! But at some point during the day my imagination stirred, and I became excited about the idea again.
I've recently been reading "Dealing with Dragons" outloud to my kids before they go to bed. I recommend it to any child who has a fascination with witches, wizards, princesses, knights, dragons, and sarcasm. Brianne has loved the book, so I decided to not call this a Barbie cake, but to dub it "Princess Cimorene and Kazul the Dragon," characters from our new favorite read. She loved the idea, and I got started:

So here is the finished Princess Cimorene. The shape of this cake is nothing special - you just need to buy the right mold. The Barbie in the middle has nothing but a stake to hold her in place below the waist. But I decided to try something new with the frosting, because I love to experiment. I have mentioned before my distaste for the fondant that has become so popular on cakes, and tastes..well, tastes like...well, it's just gross. Jessica commented on this blog a few days back with a Marshmallow Fondant that raised my curiosity. I decided to try it. Here's the recipe as she posted it:
Marshmallow Fondant:
10oz Mini Marshmallows
2 tbls Water
4 cups Powdered Sugar
1 tsp Vanilla
Melt marshmallows and water in Microwave. Mix in sugar little by little until fully incorporated add vanilla and mix. Roll out mixture onto board/counter with more sugar if needed and use.
I followed the directions as best I could, but hit a couple snags:
1. It didn't roll out the way I expected it to. At first it was too sticky for me to roll out. So I added more powdered sugar and it was too thick for me to work with. Now, I'm no expert, so somebody else should try this and post a second opinion. So I came up with something else - I re-micowaved it, and threw it on the cake as quickly as I could before it set. That worked! But it looked lumpy and uneven. So I came up with ANOTHER idea. Stick it in a warm oven to smooth it over! This worked prety well, but I did hit snage number two:
2. I toasted the mashmallow and got a few brown spots. Oops. Had to use some extra frosting flowers (with Nerds for decorative centers) on the "dress"
I will say, it was the best tasting "fondant" I've ever had. Even though it took me a while to figure out how it went on the cake!
Well Cimorene would be nothing without her dragon, Kazul. But, knowing that my small family would never even finish the Princess Cake, let alone another, I decided to make the dragon out of styrafoam. No one in family could tell it wasn't edible, and I didn't have to bake another cake. Here are some directions on putting together the dragon:
1. First of all, there's a great trick you need to know if you're going to work with styrafoam. This stuff is HORRIBLE to slice, cut, saw...so messy! But it is incredibly easy to melt. Take a knife you don't care about and heat it up.

There are probably lots of ways to heat up a knife or other tool. This seemed easiest to me. I'm open to more suggestions. Now you're going to need some foam. The directions to make the cake said to use two 9" rounds - but I had 12" circular foam pieces, so I just used those. Really, you could just piece it together with flat styrafoam even easier. Here's how it went down:


Okay, listen, you don't have to tell me - I already know. This next part was a little ridiculous. But I had to put the cake on a large surface, and why not incorporate a background? I used a sectioned posterboard I bought at the dollar store (the type for science project displays), and colored pictures that I Googled when searching for "coloring pages princess" etc.

Now comes the dragon!


Securing the styrfoam pieces together wasn't as easy as I thought. I didn't have the patience for Elmer's Glue. The hot glue gun melted the pieces. In the end I used a lot of toothpicks and skewers. I didn't have to transport it all, so it worked fine for me. Now just frost (or paint, or modge-podge, or whatever!). I decorated him with fruit slices for claws, marshmallow halves for eyes, and large chocolate chips for nostrils. The wings are just colored paper, cut and secured with wooden skewers.
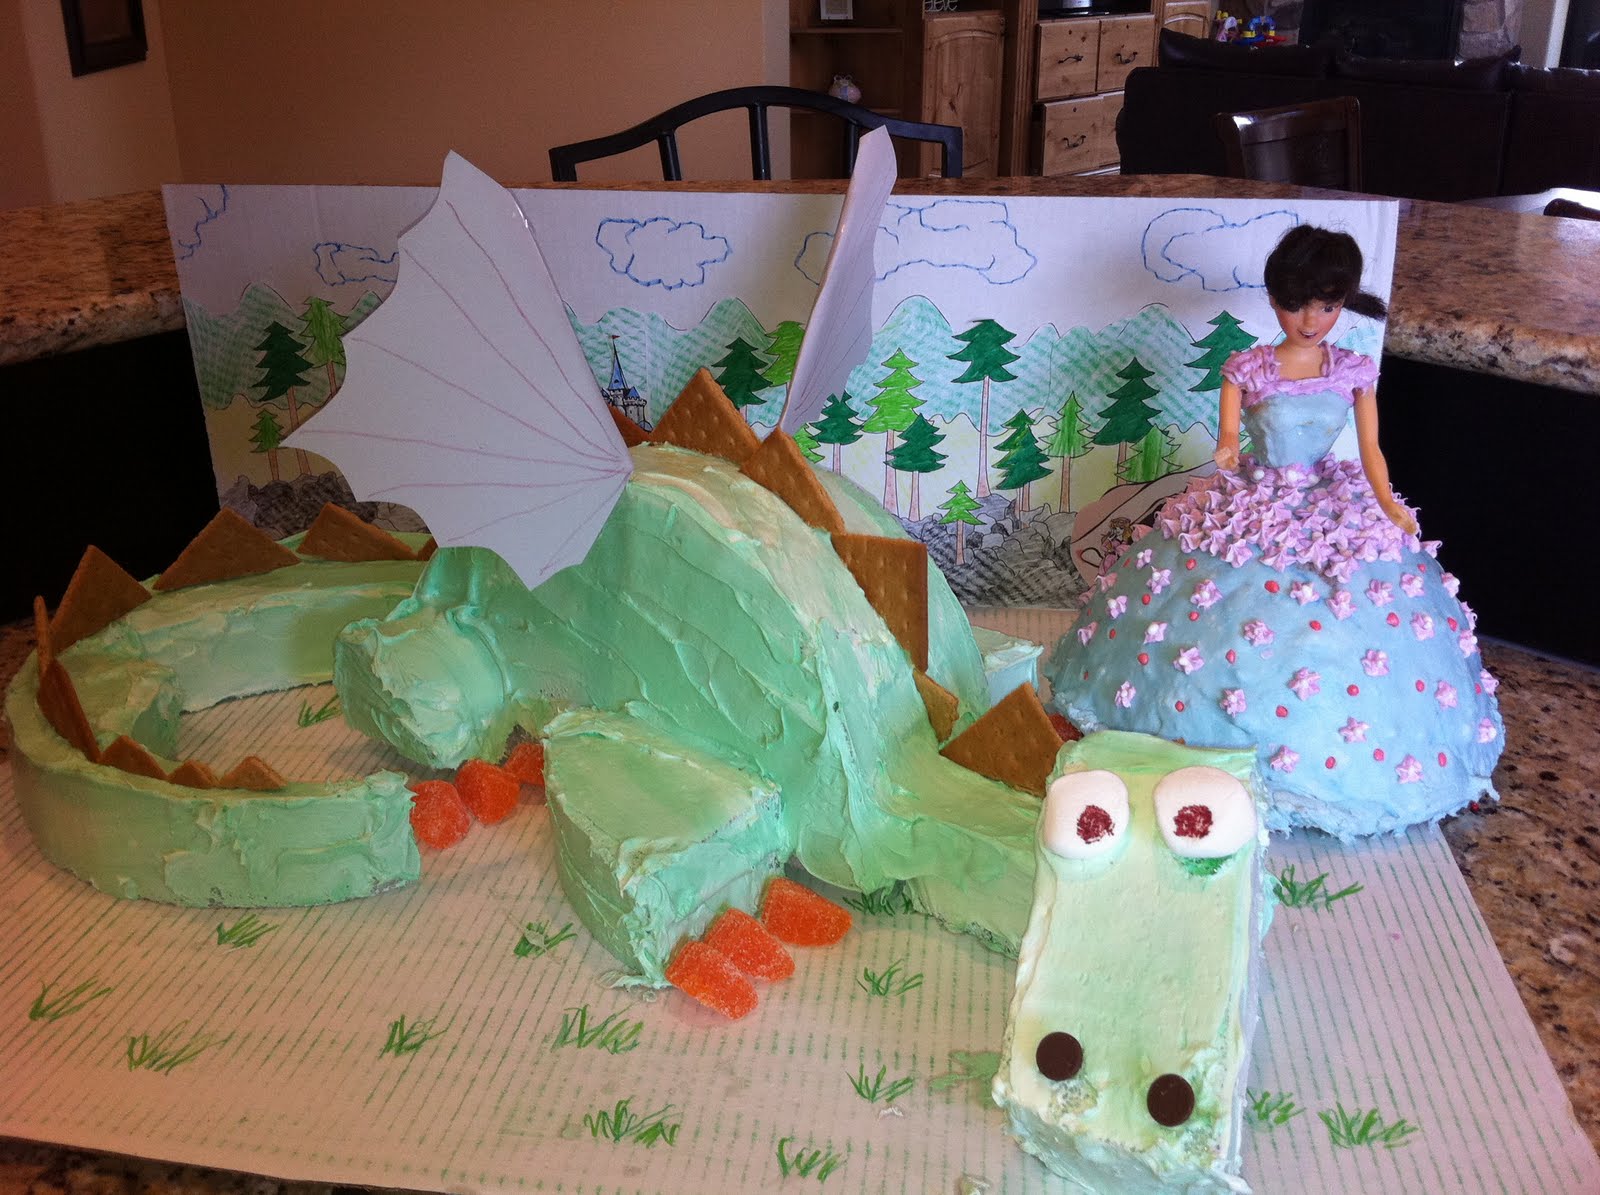
Ta-DA!
I was VERY impressed with the princess dress! Way to go! You should have made the dragon out of rice krispies instead of strofoam, like the cake boss ( it's a tv reference).
ReplyDeleteI'm so glad you tried the fondant recipe. I'm going to try it out next week on Sophie's birthday cake. I'll let you know how it goes. Your cake turned out great!
ReplyDelete